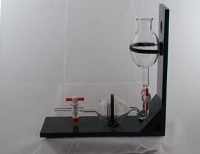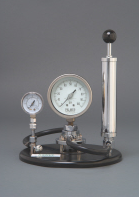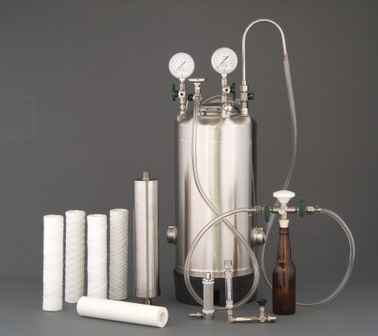
Part #9000-R Pilot Plant, Zahm Nagel Vietnam , Zahm&Nagel Vietnam , ZahmNagel Vietnam, Zahm & Nagel Vietnam
Hãng sản xuất: Zahm & Nagel Vietnam
Part #9000-R Pilot Plant, Zahm Nagel Vietnam , Zahm&Nagel Vietnam , ZahmNagel Vietnam, Zahm & Nagel Vietnam
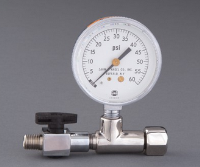
The Pilot Plant is of all stainless steel construction and designed for rugged use in the laboratory. All gauges are stainless steel 1% high accurate design. The thermometer is removable for easy cleaning of the tank. The internal carbonating stone is also removable from its sanitary quick-connect coupling for easy cleaning. The stainless steel filter cartridge disassembles easily for removal and cleaning of the filter stone (Disposable woven filter cartridges are also available). The hand filling unit uses Teflon* coated stainless steel valves –Optional quick-connect fittings are available upon request.
*Dupont, registered trademark
Operating Instructions: Filtration
(This operation is optional)
Set Up for Filtration:
- Place the filtering stone (9350) or disposable filter (9360) between the two end gaskets (9300).
- Make sure that the end plug “O” ring (9310) and the end plug (9320) have been threaded into the end of the central tube/cover assembly (9290). Now turn the handle (9330) onto the end of the central tube/cover (9290) and tighten with a wrench until the filter stone is flat against the end gaskets (9300).
- Insert the body cover “O” ring (9340) into the central tube/cover assembly. Now screw the central tube/cover assembly into the main filter body (9280) and tighten hand tight. The filter may now be sterilized using various methods.
- Insert one hose nut gasket (9580) into the 1/4″ hose nut located on the cover of the central tube assembly. The unit I is now ready to be attached to the main Pilot Plant Tank.
- Obtain a tank of “Beverage Grade” CO² gas and twin gauge regulator. This gas is available from most welding supply and dry ice companies.
Warning: CO² gas is used in the filtration, carbonation nd filling procedures. CO² gas is bottled under high pressure and could cause serious injury or death if not handled properly. Use only an approved twin gauge CO² regulator. All pressure and product lines should be equipped with hose clamps. CO² gas is heavier than air and could cause suffocation if proper ventilation is not available where the operator will be working. Eyewear protection is required while operating this instrument.
Filtration:
Note: If product is to be carbonated immediately after filtration it must be kept at a temperature of 32 degrees F./0 degrees C. For proper chilling of product see section under “Carbonating/Set-Up”. Please refer to Dwg.#F-1 for identification of valves and hoses. Line Drawings show parts identification.
- Fill tank #1 with product to be filtered and close the snap lid of the tank.
- Connect product hose “G” to outlet valve “D” of the supply tank #1. Now connect the other end of product hose “G” to the main filter body (9280). Be sure to use a 1/4 ” hose nut gasket (9580) between the hose nut and the valve on both ends of the hose. Connect the hose connector/gooseneck “H” to the main filter body and then attach the product hose to the hose connector.
- Connect the CO² gas supply line “I” from the CO² source to the valve “C on tank # 1 and then open the CO² handle and establish a pressure of approximately 5 psi on the twin regulator gauge. Now open valve “C” on tank # 1 and allow gas to fill the tank. Sweep out any air in the tank by slightly opening valve “D” for a few minutes and then close valve “D”.
- Hold the filter body in a vertical and upside down position and then open valve “D” on tank # 1. Allow the filter to fill with liquid while it displaces any air trapped in the filter system. Allow the product to overflow for several seconds until it shows free of any air bubbles.
- Turn off valve “D” and connect filter assembly to tank # 2 at valve “A”.Be sure to install hose nut gasket (9580) in the hose nut before assembly to valve “A”. Now open valve “D” and also open either valve “E” or “B” to allow for the venting of CO2 gas during the filling of the tank. Now open valve “A” and allow the product to filter into tank #2. NOTE: If the product is to be carbonated after filtration then no more than 90% of the volume of tank # 2 should be filled with the product. This will allow for equilibrium to be established during the carbonation process. Example: If the Pilot Plant Tank (#2) holds five gallons of liquid then only 4-1/2 gallons should be filtered into the tank.
- After the product has been filtered, the following valves should be closed-Vent valves “B” & “E”, “A” & “D”. Now remove filter assembly and hose “G” from both tanks and allow venting of tank #1 by opening valve “D”. If any product remains in tank # 1 after filtration, hose “G” should not be removed from valve “D” but disconnected at the filter assembly and the remaining pressurized product carefully drained into a sink.
Cleaning:
The stone should be removed from the filter housing and cleaned as per “Stone Cleaning” instructions included with the instrument. If the filter was of the disposable type it should be discarded. Clean all parts of the filter assembly, hoses and tanks and store in a clean, and dry area. Steam or chlorine may be used to clean the equipment. However, if chlorine is used, it should not be allowed to come into contact with the stainless steel for more than a few minutes as it will corrode this material. The equipment should be flushed with clean water as soon as possible after the use of chlorine.
Carbonating:
Warning: CO² gas is used in the filtration, carbonation and filling procedures. CO² gas is bottled under high pressure and could cause serious injury or death if not handled properly. Use only an approved twin gauge CO² regulator. All pressure an product lines should be equipped with hose clamps. CO² gas is heavier than air and could cause suffocation if proper ventilation is not available where the operator will be working. Eyewear protection is required while operating this instrument.
Protective eyewear must be worn while operating this instrument.
The Pilot Plant has been tested at the factory for leaks prior to shipment. If the instrument has not been used for a period of time it should be pressurized and, if there is any pressure drop, then a soapy water solution applied to the various fittings to detect the leaking area.
If the leaking area can not be stopped by tightening with a wrench then it may be necessary to remove the fitting and apply Teflon tape to the threaded area that is leaking.
Set Up for Carbonating:
Temperature:
The product must be kept at 32 degrees F./0 degrees C at all times during the carbonating procedure. The Pilot Plant Tank should be immersed in an ice bath to keep the temperature from rising above this point. If the product contains alcohol the temperature may be lowered several degrees more by adding salt (NaCl) to the water/ice solution. Be careful, however, not to freeze the product by adding too much salt. Normally, the product is “pre-chilled” before it is immersed in the ice bath to save on ice and time required to lower to the required temperature. CO² gas goes into solution very rapidly when the product is at these lower temperatures. Foaming is also reduced during the “Bottling” operation when lower temperatures are used.
CO² Gas Supply:
Use “beverage grade” CO² gas and a twin gauge CO² gas regulator. This is available from welding supply or dry ice companies.
Installation of Carbonating Stone:
Please see Dwg. #C-1 for reference to this installation. The carbonating stone with holder “S” is preassembled at the factory but needs to be snapped into place at the quick-connect fitting “QC”. To do this, remove the snap lid from the tank and, holding the stone assembly in the palm of your hand, place it in the bottom of the tank. Now point the quick-connect fitting of the stone upwards towards the opening of the tank and push upwards on the stone assembly and matching quick connect fitting. The assembly will snap smoothly into place. To remove the stone for cleaning simply pull up on the quick-connect and the stone assembly will drop out of the fitting.
Location of Equipment:
If bottling is to be done immediately after carbonating then it is advisable to have the Pilot Plant and cooling vessel elevated approximately 30″ high on a bench or table. This eliminates having to lift the tank, product and ice bath for bottling once carbonation is completed. Bottling is “gravity fed” and therefore the tank has to be placed somewhat near shoulder level of the operator while filling the bottles.
Purging Pilot Plant Tank:
Note: If product has been filtered and has remained in the Pilot Plant tank, it will not be necessary to purge the tank as this has already been accomplished in the “Filtering Operation”. Please refer to drawing # C-1 for identification of hose attachments. Parts may also be identified from the line drawings.
Purging:
(PRIOR TO PUTTING PRODUCT IN THE TANK)
- Attach hose “1” from the CO² gas supply regulator to valve “F” on the Pilot Plant Tank. Be sure to install a 1/4″ hose nut gasket (9580) inside the hose nut before threading the nut onto valve “F”.
- Close the snap lid and all valves of the Pilot Plant Tank.
- Open valve “F” on the Pilot Plant Tank and also the valve on the gas supply tank. Adjust the CO² regulator to read about 10 psi on the regulator gauge. When gauge # 2 on the Pilot Plant Tank shows this pressure reading (within a few pounds), open one of the vent valves (E or B) and let the CO² gas escape from the Pilot Plant Tank for several minutes. This will sweep out any air remaining in the Pilot Plant Tank.
- Now adjust the CO² pressure back to zero psi on the regulator and remove the snap lid from the Pilot Plant Tank. Also, close the vent valve that was open. The Pilot Plant Tank is now purged and ready to be filled with the project.
- Place a 20 to 30 gallon cooling vessel on a table approximately 30″ high. Put the Pilot Plant Tank in the vessel and add the product to be carbonated to the Pilot Plant Tank. Do not fill the Pilot Plant Tank to more than 90% of its capacity as this allows for a headspace and equilibrium to be established. Add ice and water to the cooling vessel to maintain product temperature.
- Now turn on the CO² gas supply and establish a pressure of about 5 psi in the Pilot Plant Tank. Open the relief valve “RV” and allow the CO² gas to escape for several minutes. This action will help remove dissolved air in the product.
- Slowly increase the CO² gas pressure and at the same time continue to close the relief valve “RV” until no CO² gas is heard escaping from the valve. Keep doing this until the desired pressure is obtained in the Pilot Plant Tank and no gas escapes from the R.V.
- Now close valve “F” and rock the Pilot Plant Tank back and forth. Observe the pressure reading on gauge #2. If it drops after rocking the tank, open valve “F” and allow more gas to be put into solution. This action may have to be repeated several times until a steady gauge pressure is obtained and equilibrium is reached (wherein temperature and pressure remain constant). Record the temperature and pressure. The volumes of CO² in the tank may now be determined by reference to the gas charts supplied with the pilot plant. Be sure to reference the correct chart (CO² in water or CO² in beer) when determining volumes of CO² gas. It should be noted that some loss of volumes of CO² gas is to be expected during the bottling operation. Therefore, it will be necessary to “over-carbonate” the product in the Pilot Plant Tank in order to obtain the correct volume of CO² gas in the bottle. This correction factor can only be determined through experimentation, but generally will run from .3 to 1.0 volumes of “over-carbonation” in the Pilot Plant Tank. The amount of time required to carbonate a product will depend upon its chemical make up and the CO² content desired. Normally, ten to thirty minutes is required to carbonate a product.
- Now close valve “F” on the Pilot Plant Tank and then turn off the CO² gas supply.
- Disconnect the CO² gas supply hose from valve “F” . The carbonating procedure is now completed and the product ready to bottle.
Bottling
Warning: CO² gas is used as counter-pressure gas in the bottling procedure. CO² gas is bottle under high pressure and could cause serious injury or death if not handled properly. Use only an approved twin gauge CO² regulator. All pressure and product hoses should be equipped with hose clamps. CO² gas is heavier than air and could cause suffocation if proper ventilation is not available where the operator will be working.
Eyewear protection is required while operating this instrument.
Set-Up for Bottling:
Please refer to Drawing # B-1 for proper hook up of CO² and product hoses. Parts identification can be made from Line Drawings.
Bottles:
If bottles are dirty they should be soaked in a 10% caustic solution and flushed with clean water. If bottles are new and cased they still should be flushed with cold water to remove any case dust that has accumulated inside the bottle. Dust particles on rough surfaces inside the bottle form nucleation sites.CO² bubbles will form at the nucleation and cause excessive foaming due to the rapid release of gas from the solution. The use of cold water also helps reduce foaming problems during the filling operation.
Caps:
A standard crimp style closure should be used to seal the bottle. “Twist” style closures may be used but tend to leak in this manual capping operation. Closures are provide with the Pilot Plant, and additional closures may be purchased from Zahm & Nagel CO.
Hand Filler (P/N 9800):
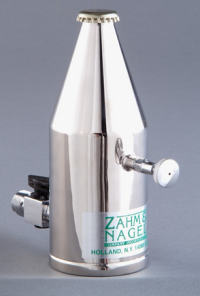
This unit is used to fill the bottles from the Pilot Plant Tank and will fit most bottle neck diameters. The filing tubes supplied with the Hand Filler range in size from 7″ to 11″ long. It is important that the bottom of the fill tube be as near the bottom of the bottle as possible when filling. This helps to reduce excessive foaming in the filling operation. If the fill tube is not long enough, a piece of tygon tubing may be added to the bottom of the fill tube and adjusted for proper length.
Temperature:
The produce must be kept at 32 degrees F./O degrees C. At all times during the bottling procedure. The tank should be immersed in an ice bath to keep the temperature from rising above this point. Chill bottles and, where possible, product lines.
CO² Gas Supply:
The same “Beverage Grade”CO² gas should be used as counter-pressure gas in this operation.
Location of Equipment:
The operation will be most comfortable filling the bottles while sitting in a fold up stye chair. The cooling vessel with the Pilot Plant should be located on a table approximately 30″ from the floor. The bottles are filled by gravity, therefore; are located on the floor. The Hand Capper/crowner (9000-700) may also be placed adjacent to the bottles.
Bottling:
- The Pilot Plant should remain elevated in the ice bath vessel and hoses attached as follows:
- CO² gas guppy –Attach CO² line “I” to valve “E” on the Pilot Plant Tank. If the optional quick-connect fittings are not used then hose nut gaskets (9580) will have to be installed on all CO² and product hoses for this and all remaining steps.
- The product hose “P” is attached to outlet valve “A” of the Pilot Plant Tank via the hose connector & nut. The other end of product hose “P” is attached to valve “D” of the Hand Filler (9800). Be sure this connection is made on the “fill tube” side of the Hand Filler and not the CO² counter-pressure side.
- Connect one end of the CO² counter-pressure hose “CP” to the vent valve “B” of the Pilot Plant Tank. Now connect the other end of hose “CP” to the Hand Filler (9800) at valve “C”. Be sure this is connected to the “counter-pressure” side of the Hand Filler and not the “fill tube” side.
- Be sure that the hose clamps are properly installed on all CO² and product hose connections and that none of the connections are leaking.
- Open valve on CO² gas supply and also valve “E” of the Pilot Plant Tank. Establish a counter-pressure on gauge #2 several pounds higher than the equilibrium pressure that was established in the carbonating procedure. This will allow for smooth filling of the bottle and reduced foaming. Example: If 20 psi was the equilibrium pressure during carbonation then 22 psi would be the counter-pressure required in the Pilot Plant tank head space. Do not be concerned if gauge #1 & #2 show different reading of several pounds. This is due to the dense porosity of the carbonating stone. Always refer to gauge #2 when bottling.
- Open valve “A” & “B” on the Pilot Plant Tank. Make sure valves “C” and “D” are closed.
- Insert the fill tube of the Hand Filler into a collection container and open valve “D” of the Hand Filler. Allow several ounces of product to flow out of the Hand Filler and then close valve “D”. This procedure allows complete filling of the product hose “”P before filling the first bottle. You are now ready to begin filling.
- Check to make sure that the bottom of the fill tube of the Hand Filler is of proper length for the bottle being used. The fill tube should come close to the bottom of the bottle when the Hand Filler is inserted in the neck of the bottle. Now place a bottle on the floor and insert the Hand Filler into the bottle. Press down on the Hand Filler to make a firm seal and open the bleeder valve “BV”. Now open valve “C” and the CO² counter-pressure line “CP” and allow gas to fill the bottle and vent out through the bleeder valve. The bleeder valve should be opened just enough to allow gas to “hiss” through it and should remain open during the entire bottling operation. Opening the valve “full” will allow for a more rapid filling of the bottle but may also produce excessive foaming. Some experimentation will be required to establish the correct setting on the bleeder valve in order to give the proper fill rate in the bottle.
- Keep the Hand Filler sealed in the bottle and then open valve ‘D” and allow product to fill the bottle. Do not fill bottle to the top but leave some headspace for expansion of the liquid.
- Close valve “D” and also “C”. Allow any remaining gas to escape through the bleeder valve. Now carefully remove the Hand Filler and cap the bottle using the Zahm Model 9000-700 Bottle Capper.
The bottle can now be checked for air or CO² volume s of gas using the Zahm Model 7000 air and CO² Tester. If CO² levels are below those expected in the bottle it will be necessary to “re-carbonate” the product to a higher level of gas content. Refer to the “carbonating” instructions.
Some carbonated products tend to foam excessively. The following suggestions may reduce this tendency to foam:
- Make sure bottles are clean and rinsed.
- Cool bottles in an ice bath — do not freeze.
- Increase counter-pressure in the headspace of the Pilot Plant Tank.
- Slow down the fill rate in the bottle by adjusting the bleeder valve to a slower fill rate.
- Allow the Hand Filler to remain in the bottle for a longer period of time after the bottle has been filled to the proper level. This delay in removal of the Hand Filler allows the product to stabilize in the bottle.
NOTE: If desired, the carbonated product may be canned rather than bottled using can filler # 9000-600. After the can has been seamed properly, it may be checked for air and CO² content with Zahm model 7000 tester.


 Mr. Trí